Activate your user
Activation link
An admin will send an email invitation containing an activation link. Please click on the Access button. You will be redirected to the password setup page.
Password set-up
Once the browser displays the set-up password page, please fill in your password and confirm it. Be aware that certain rules need to be followed for this setup. When this step complete click on Set new password button and you will be redirected to a confirmation page. Press the Ok button.
Login page
You will be redirected to the login page. Fill in your email address and password and press the Login button to continue.
Secure your account
To further secure your account install an authenticator application on your mobile device if you do not already have one. You can use Google Authenticator or Microsoft Authenticator or other authenticator app.
On login, a QR code appears. Scan it with your authenticator app, then enter the generated verification code on the Dashboard to finish setup.

User management
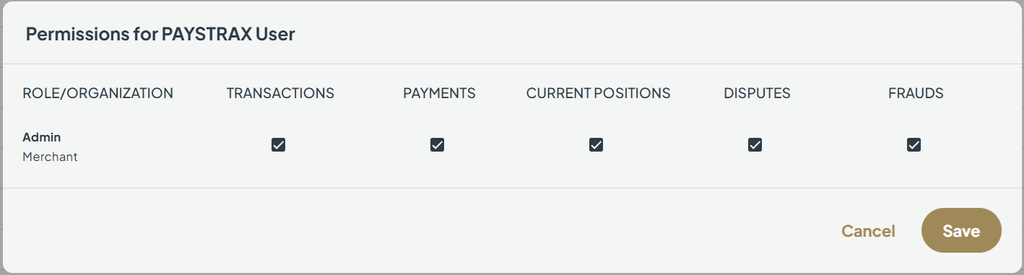
If you are an Admin, you have full access to the Admin Panel, where you can manage users within your organisation. From here, you can view a complete list of all existing users, filter them, send invitations to the ones imported from Salesforce, but not yet activated, and adjust permissions so they can access specific financial sections.
Sending an invite
In the User List, look for the user whose Status is set to Imported.
Select the checkbox next to their name.
The Send Invite button will appear — click it to send the invitation.

User menu
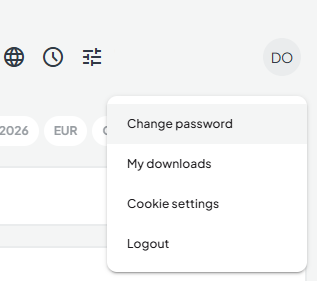
The user menu, located in the top right corner of the interface, offers a few essential account related actions.
When you click your username or the user icon, a small menu appears with these options.:
- Change your password: Select this option to update your account password. You’ll be taken to a “Reset Password” page where you must enter your new password and then confirm it. Once saved, your password is updated immediately and redirected to the login page.
- Logout: Choose this option to sign out of the application and end your session. The system will return you to the login screen.

Global filters
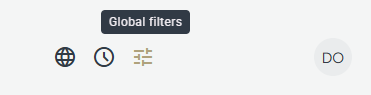
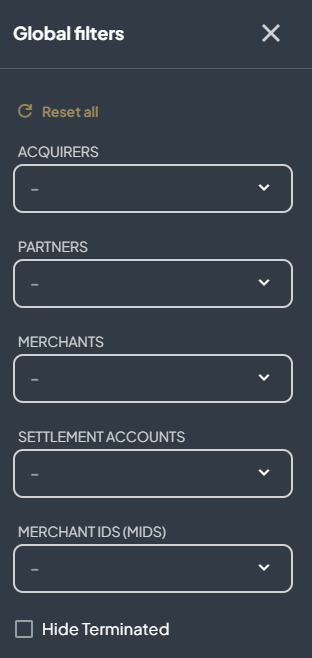
Managing large amount of information can be challenging. Global Filters make it easier by allowing users to quickly narrow down the data. The Global Filters icon is located in the top-right corner of the screen, next to your profile icon.
Partners
- Merchant – Select a specific merchant from your list.
- Settlement Account – Filter data by settlement account.
- MIDs – View data for selected MIDs.
- Hide Terminated Merchants – Exclude merchants that are no longer active.
Merchants
- Settlement Account – Filter data by settlement account.
- MIDs – View data for selected MIDs.
- Hide Terminated Merchants – Exclude merchants that are no longer active.
These filters can be combined to help you quickly locate the exact data you need.

Dashboard section
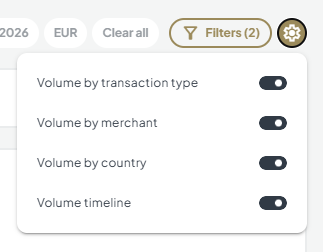
In this section you may see a visual overview of your transactional data in charts, helping you quickly spot patterns and trends. You may filter data. Possible options for these are as follows:
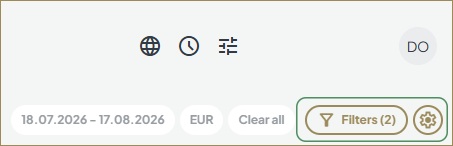
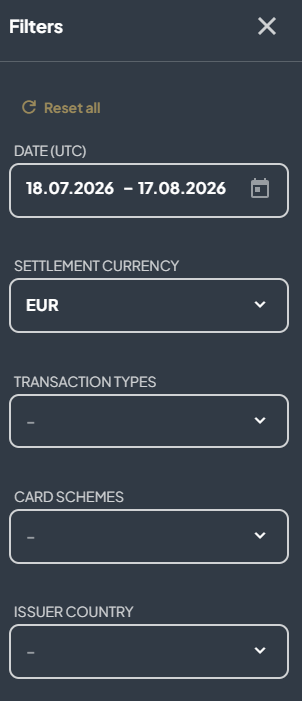
- Filter by date range, currency, transaction types, card schemes or issuer country.
- Hide/ Show graphics displayed by clicking on the setting icon next to the filters button.

Transactions
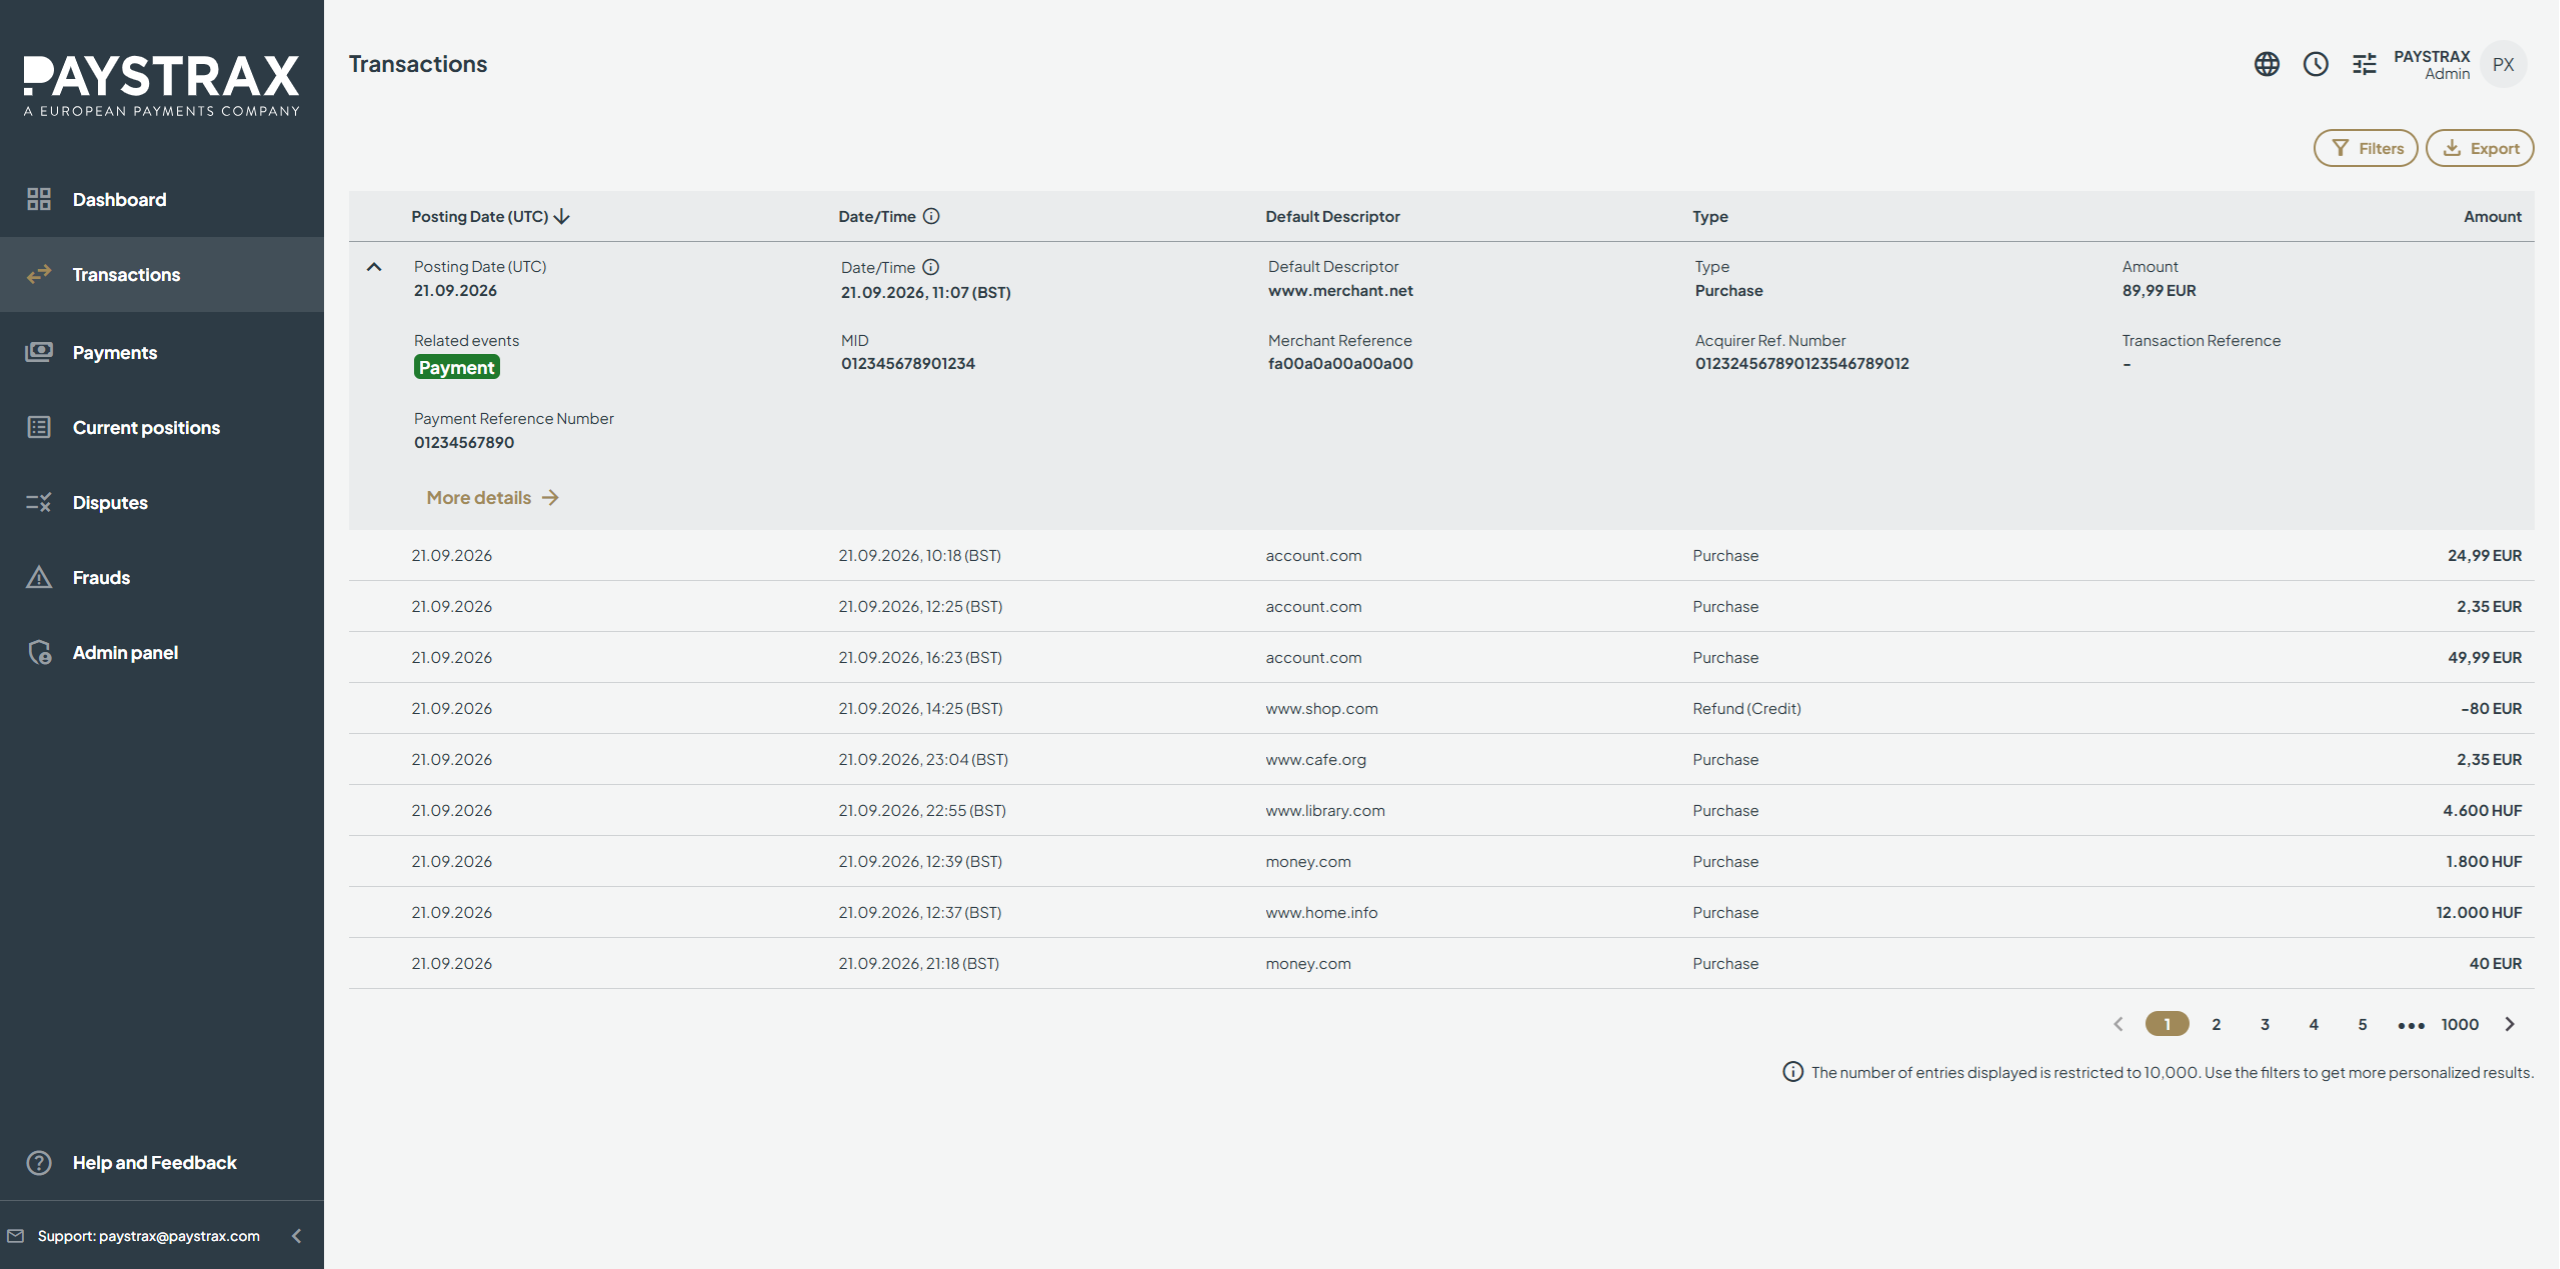
Use this section to easily review and explore your transactions records:
- Transaction Overview: Quickly see all your transactions at a glance.
- Sorting Made Simple: Click any column header (such as date or amount) to sort your transactions in ascending or descending order.
- Easy Filtering: Narrow down the data by applying filters (for example, by date range, transaction type, or amount).
- Multi-page Navigation: If your transaction list spans more than 10 entries, use the page navigation controls to move between pages.
- Expand for Details: Click any transaction row to expand it and view additional information right away.
- “More Details” Option: Within an expanded row, select “More Details” to access an even more detailed view of that transaction.
- Access Related Data from the “More Details” page: Seamlessly switch to related financial information – such as payments, fraud cases, or disputes – using the available navigation links.

Payments
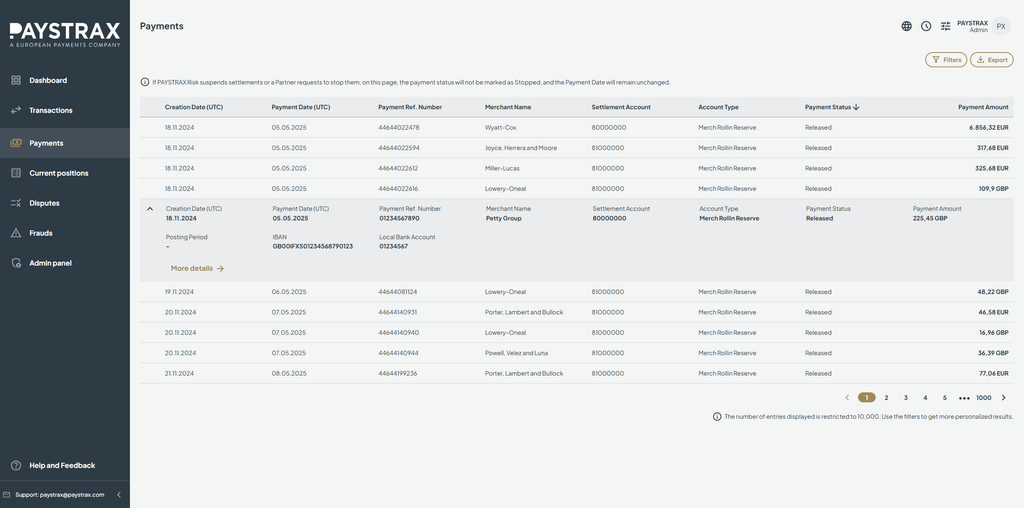
Use this section to easily review and explore your payment records:
- View an overview of all payments: Quickly scan key payment details in a well-organised list.
- Sort by any column: Click a column header to arrange payments in ascending or descending order.
- Filter results: Narrow the list to show only the payments you’re interested in.
- Navigate through multiple pages: If there are more than 10 payments, use the page controls to move between them.
- Expand a payment for more details: Click on a row to reveal additional payment information right in the list.
- Open the full payment record: From the expanded view, select More Details to see the complete record.
- View and export payment breakdowns: For Payment Account – Retail account types, a Payment Breakdown is available on the More Details page. You can also download this breakdown as a CSV or PDF file.

Current positions
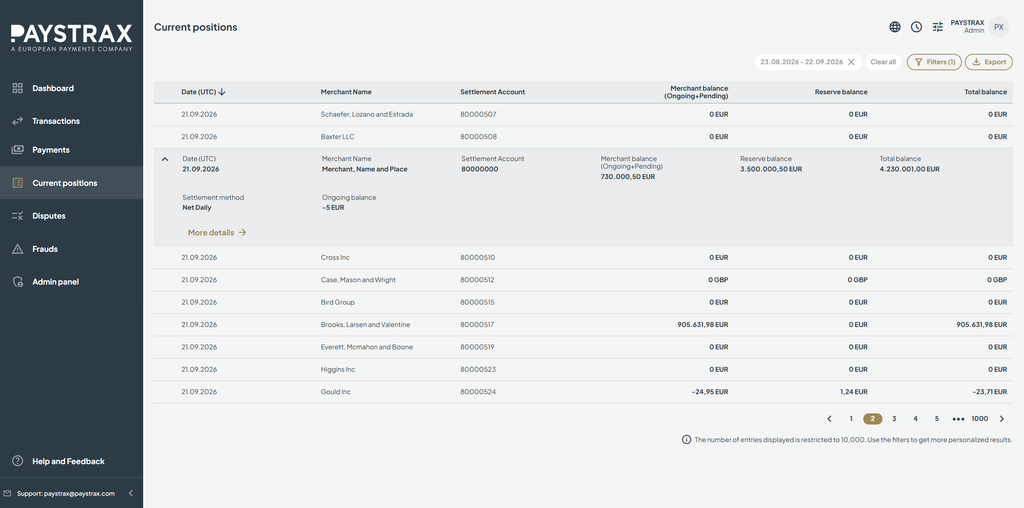
This section gives you the tools to review, filter, and export your current positions with ease:
- View an overview of all current positions: See key details for each position in a clear, organised list.
- Sort the list: Click on any column header to sort positions in ascending or descending order.
- Filter the data: Narrow down the list to only the positions that match your criteria.
- Navigate through multiple pages: If more than 10 entries are available, use the page controls to move between them.
- Export results: Save filtered positions as a CSV or PDF file for offline use or reporting.
- Expand a position: Click on a row to view additional details right in the list.
- Open the full details page: Inside the expanded row, select More Details to see the complete breakdown.
- Breakdown filtering & export: On the More Details page, you can filter the breakdown of that current position and export it to CSV or PDF.

Disputes
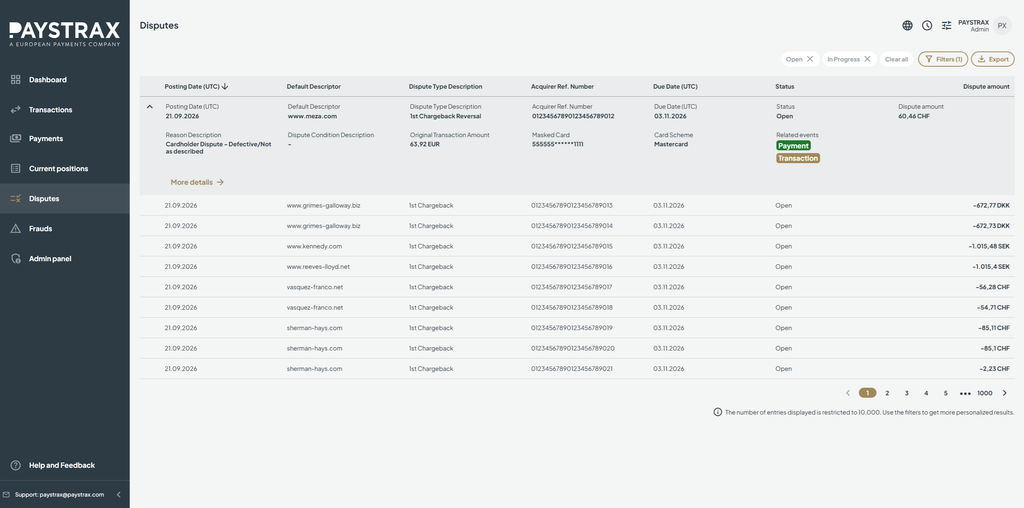
This section helps you easily review and manage dispute records:
- View an overview of all disputes: See key details for each dispute in one convenient list.
- Sort the list: Click any column header to arrange the disputes in ascending or descending order.
- Filter the data: Use the filter controls to focus on the disputes that matter most to you.
- Navigate through pages: If there are more than 10 disputes, use the pagination controls to move between pages.
- Expand a dispute for more information: Click on a row to reveal additional details.
- Open the full dispute record: From the expanded view, click More Details to access the complete dispute information.

Frauds
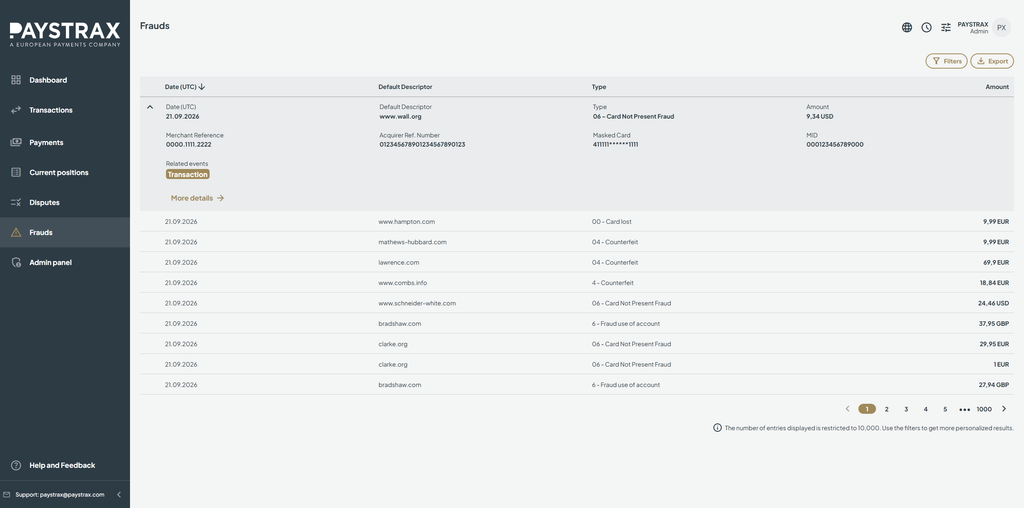
In this area, you’ll find several tools to help you explore and manage fraud records efficiently:
- View an overview of all fraud cases: Quickly see key details at a glance.
- Sort information: Click any column header to sort the list in ascending or descending order.
- Filter results: Use the filter options to narrow down the list and focus on the records you care about most.
- Browse multiple pages: If more than 10 entries are available, use the page navigation controls to move between pages.
- Expand a row for more information: Click on a row to see an expanded view of that fraud record.
- Access full details: Inside the expanded row, select More Details to open the complete record with all available information.

Language and timezone
Language
The default dashboard language is English, but you can easily switch it to Icelandic if preferred.
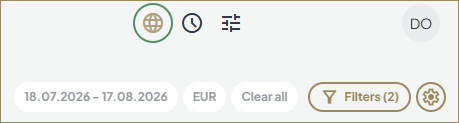
In the top-right corner, next to your profile information, you’ll find a globe icon.
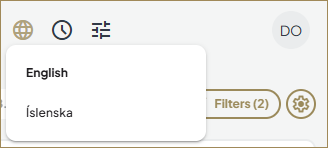
When you click on it, a list of available languages will appear. Simply select the one you’d like to use.
Time zone
Users can set their own local time zone, which changes how dates and times are displayed.
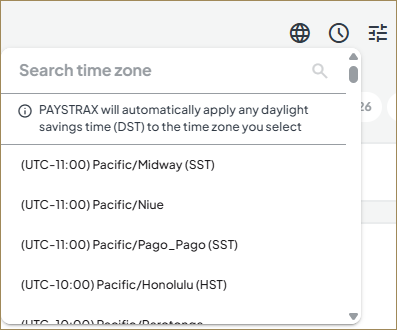
- It applies to any date/time field, so timestamps display in the selected time zone.
- Useful for matching receipts in local time.
- It does not apply to date fields with no associated time. These are always shown in UTC.

Self-service
On the top navigation menu you will find Self-service button. This page consist of three main sections:
Request Types
Located in the left-hand navigation panel, allows you to select the type of request you want to submit.
Request Table
Displays your existing requests, including drafts and previously submitted requests.
New Request
Select the Create New Request button to start a new request.

Availbale self-service requests
Bank Account Changes:
- Settlement to Third Party
Use this request to update settlement details so funds are paid to a third-party bank account.
Complete the required fields, download and sign the form before uploading with supporting bank documentation. - Settlement to Merchant
Use this request to update settlement details so funds are paid directly to the merchant’s bank account.
Complete the required fields, download and sign the form before uploading with supporting bank documentation.
Additional Settlement Currency
Use this request to add an additional settlement currency to your account.
Complete all required information and upload any supporting documentation requested.
Form Actions
Each request form includes the following options
Cancel
- Closes the form without saving.
- Any information entered will be discarded.
Save as Draft
- Saves your progress so you can complete the request later.
- Drafts are available from the request table.
- All entered information and uploaded documents are retained.
Send Request
- Submits the completed request to PAYSTRAX for processing.
- Once submitted, the request will be reviewed by the PAYSTRAX team.
Request Status Updates
As PAYSTRAX processes your request, its status will be updated in the request table.
- Draft – data saved, can be accessed to complete and submit.
- Sending – temporary status while the form is submitted to the PAYSTRAX team.
- Error – issue with the form submission.
- Requested – submitted to the PAYSTRAX team and pending action.
- In Progress – being reviewed by the PAYSTRAX team.
- Rejected – rejected by PAYSTRAX team, further information will be provided to you.
- Completed – request completed by PAYSTRAX team.
You can monitor the status of your requests directly from the Self-Service request table.

Help and feedback
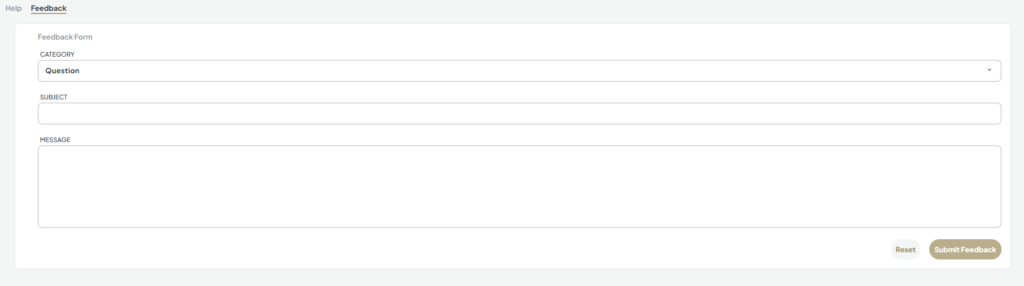
To help us improve and gather your feedback, we’ve created a Help & Feedback page, which you can find in the bottom left corner of the Dashboard.
On the Help section you can find User Manuals and Frequently asked questions.
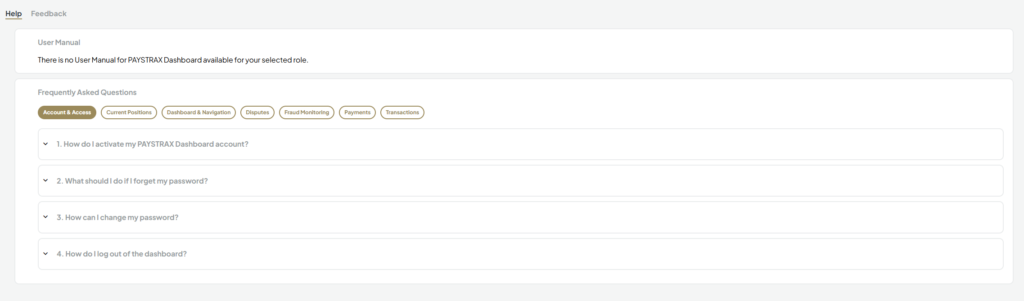
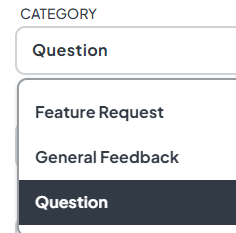
In the Feedback section, you can send a direct message to our team. Simply select
the appropriate category, enter your message, and click the “Submit Feedback”
button below.