Use Remote Access Module to find transactions, review their results, prepare refunds and export transaction data. This guide starts from the Transactions screen after you have signed in.
Screen labels match the examples shown. Screenshots show example transactions; their dates, amounts and currencies are illustrations, not values to enter.
1. Find a transaction
1. Select Transactions in the navigation at the top left.
2. Set the From and To dates for the period you want to review. Check the other filters shown, such as Type and Mode, and adjust them as needed.
3. To find a specific transaction, enter your search value in Search, then select SEARCH on the right. Review the results against the transaction you need.

2. Use more filters
Use additional filters to narrow a large set of results or search by a transaction identifier.
Select
From Transactions, select More filters.
Choose
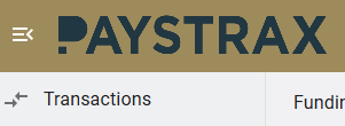
In Search Filters, open Select a filter. Choose the field you want to use, such as Transaction ID, Status, Currency or Amount.
Enter values
Enter or select the required filter value, using the controls displayed for that field.
Save
Select SAVE. Back on the Transactions screen, select SEARCH to refresh the results.
3. Choose columns and read status indicators
Choose the columns you see
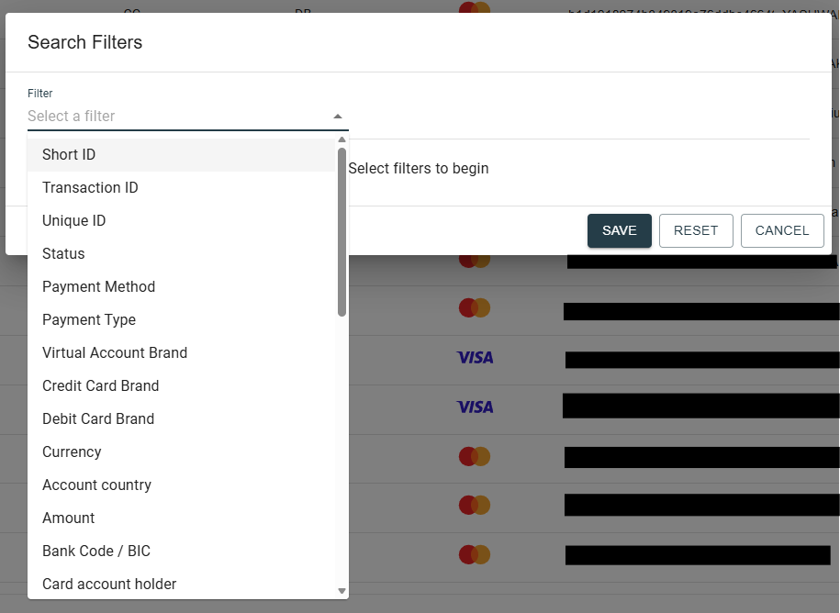
1. On the Transactions screen, select the Show/Hide columns icon shown below.
2. Use the switches to show or hide individual columns. Use SHOW ALL or HIDE ALL if you want to change the full selection.
Read the status indicator
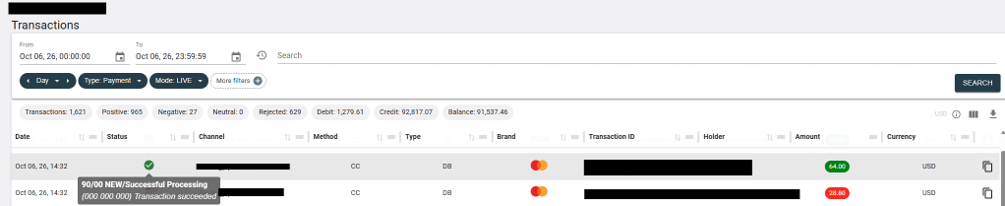
The examples use a green indicator for a successful result and a red indicator for a rejected result. Hover over the status indicator to see the result summary. Open the transaction to check its result code and description; do not rely on colour alone.
4. Review transaction details
Transaction details
Find the transaction in Transactions and select its row to open Transaction Details.
Check details
Check the transaction identifier, amount, currency and date to confirm that you have opened the correct record.
Review results
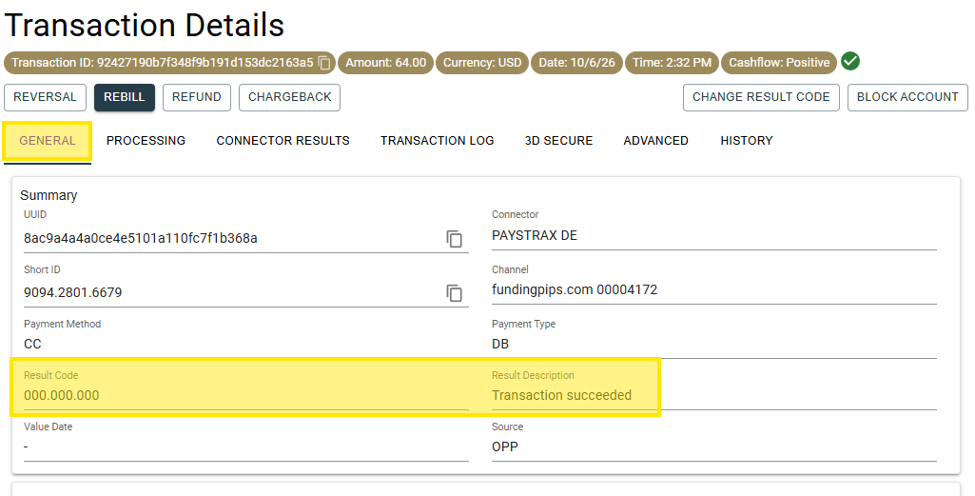
Select GENERAL. Review the Result Code and Result Description in the Summary section.
Use the result to decide what to check next
For a rejected transaction, review the additional information on CONNECTOR RESULTS (section 5). For a refund, check the transaction and your approved procedure before using REFUND (section 6).
Recognise a rejected result
In the example below, the red status indicator has a hover summary with a rejection result. Read the displayed description for the selected transaction rather than assuming that all rejections have the same cause.

5. Investigate a rejected transaction
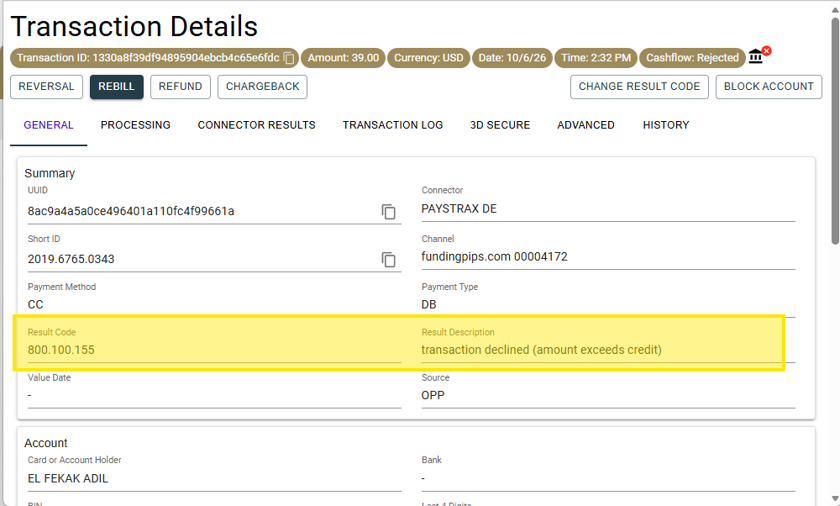
1. Open the rejected transaction and select GENERAL. Read the Result Code and Result Description.
2. Select CONNECTOR RESULTS for more information. Review the connector response and any ExtendedDescription shown.
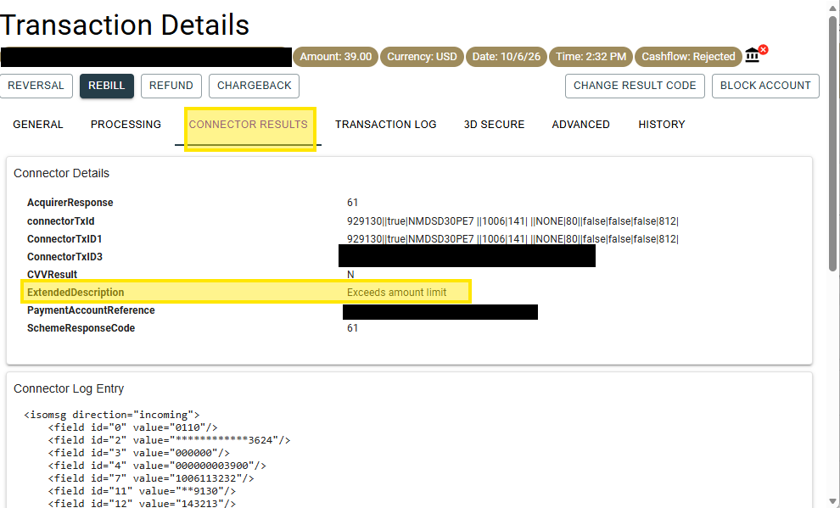
3. Use the displayed details when following your approved support or investigation process. Record the transaction identifier, result code and description. If the reason remains unclear, seek guidance before taking further payment action.
6. Prepare a full or partial refund
Operational validation required. Confirm refund eligibility, permissions, the refundable balance and how to verify completion before publishing or using this procedure. The examples show where to enter a refund; they do not establish refund policy or customer crediting times.
1. Find and open the original transaction. Check its identifier, amount and currency, and confirm the amount to refund under your approved procedure.
2. Select REFUND at the top of Transaction Details.
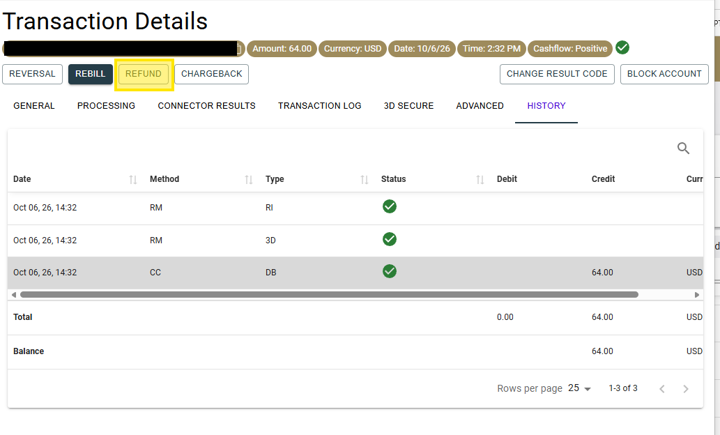
3. In the Refund form, check Original Amount and the currency. For a full refund, enter the full amount permitted by your procedure. For a partial refund, enter the lower amount you intend to refund in Refund Amount.
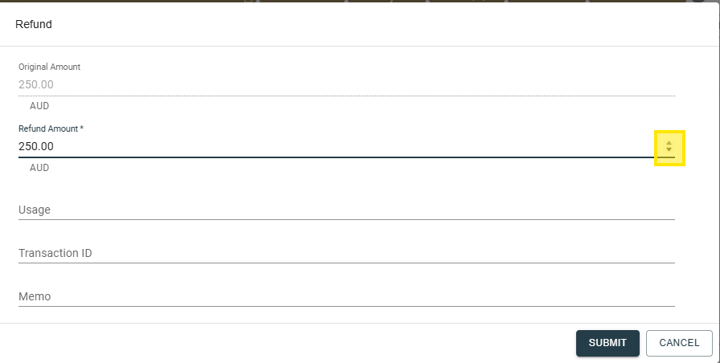
4. Review the amount and any other required fields. Select SUBMIT only when authorised to proceed, or CANCEL to close the form without submitting.
5. Check the resulting record and status under your approved procedure before treating the refund as complete. If the outcome is unclear, verify it before submitting another request.
7. Export transaction data
1. In Transactions, set the date range and filters for the data you need, then select SEARCH.
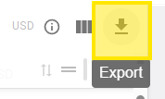
2. Select the Export icon on the right of the transaction list.
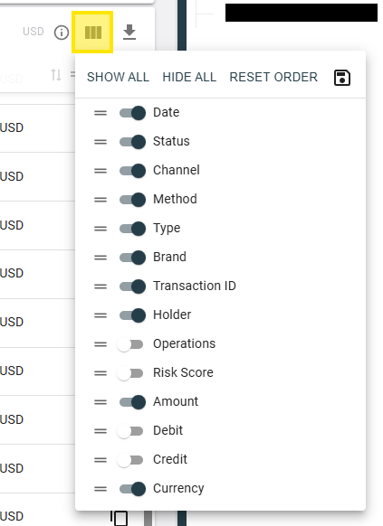
3. In Export Details, choose a template if required. Select a field under Available and use the right arrow to add it to Selected. Use the left arrow to remove a selected field.
4. Use the controls beneath Selected to move fields up or down and set the column order.
5. Review Format settings, including the header, delimiter, text enclosing and decimal separator options. Check whether Export timestamps in UTC should be selected for your reporting needs.
6. Select EXPORT. Open the exported file and check its date coverage, fields and totals against the data you intended to export.