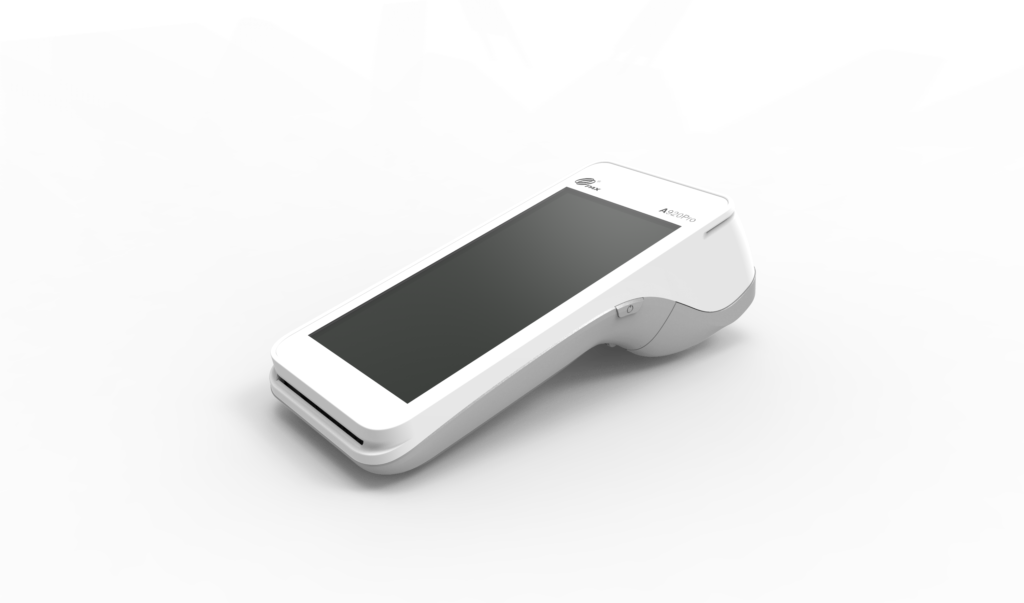
The Pax A920 is a powerful, portable card reader, running an Android operating system, that accepts highly secure payments.
The Pax A920 can be used together with either the smart app or a full Point of Sale system (in which case, please contact your POS solution provider for support).
This is your quick getting-started guide for Pax A920 and Pax A920 Pro card readers.
Product Introduction
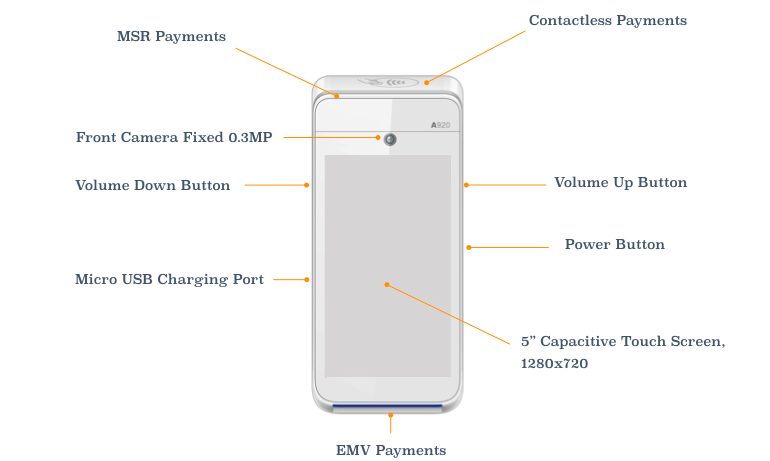
Front Description
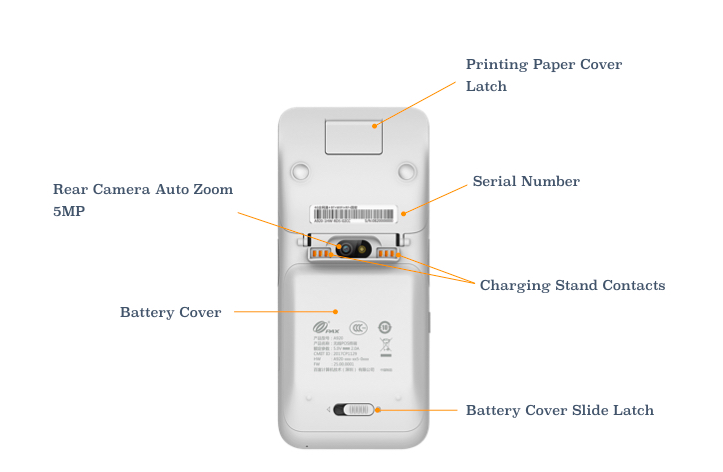
Back Description
Battery
Before starting your SmartPOS solution with the Pax A920, the card reader should ideally be fully charged.
But beforehand, you need to:
- Push the battery cover slide latch (at the back of the card reader) to the right to open
- Remove the battery case (lift from the bottom)
- Lift out the battery (lift from the bottom)
- Remove the battery protective strip from the battery connectors (this is important)
- Re-insert the battery and casing, pushing back the cover slide latch to the left
To charge the card reader, plug the micro-USB connector to the micro USB port on the left side of the terminal.
Security
Our payment platform includes stringent P2PE (point-to-point encryption) security to protect sensitive card data. But as a merchant, you are responsible for the security at the point of sale. Therefore, we recommend conducting a thorough inspection of your card reader at least once every three months to identify any potential signs of fraud. Look for indications that the card reader may have been tampered with or substituted.
Getting started
With the Pax A920, you can choose between Wi-Fi and cellular connectivity. Below you will find correct steps for both options.
For Wi-Fi Connectivity:
- Turn on the card reader by pressing and holding the power button on the right side for 2-4 seconds
- Use the touch screen to bring the settings bar down from the top of the screen. You must pull it all the way down until the settings appear in full
- Select the Wi-Fi name (below the Wi-Fi icon)
- Select the toggle switch to enable Wi-Fi
- Once the list of available Wi-Fi networks appears, select your network
- When your card reader has successfully connected to the network, it will confirm this action by displaying “connected” below the network name
- Start the Payments app if necessary.
For Cellular Connectivity:
You will receive a mini-SIM that is exclusively configured for you and likely to be already installed in your card reader.
To check if your SIM is already installed, please follow the following steps:
- Make sure your card reader is turned off using the power button
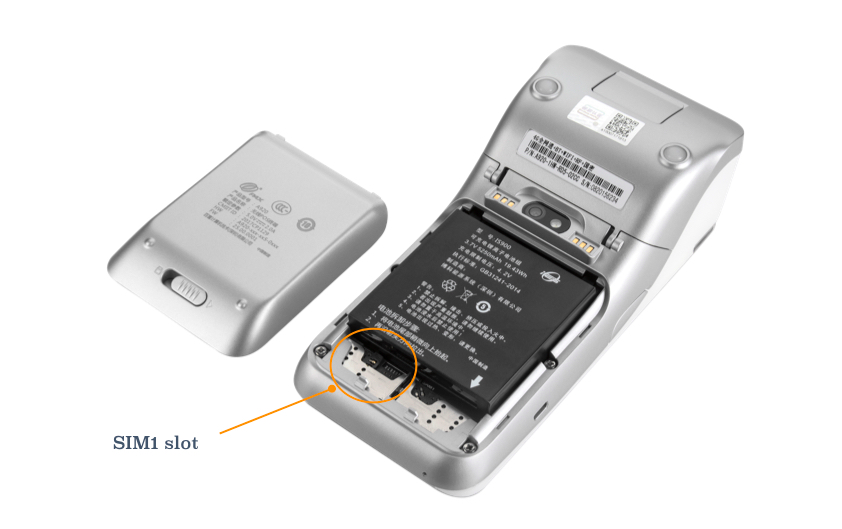
- Push the battery cover slide latch (at the back of the card reader) to the right to open, remove the battery case (lifting from the bottom) and take out the battery (also lifting from the bottom)
- Once removed, you should see your SIM card in the SIM1 card slot (on the left-hand side) otherwise insert it here (see the below images)
- Re-insert the battery and casing, after which you need to push the cover slide latch back to the left
- Re-start the Payments app: Force close the app and tap on it to open it again.
To activate your SIM card, all you need to do is:
- Turn on the card reader by pressing and holding the power button on the right side for 2-4 seconds
- Connect the terminal to the Wi-Fi
- Open the app and go to the app settings (cogwheel)
- Click the “activate sim card” button (might require scrolling down a bit)
At this time the device should be used only with the SIM card.
Printing
The Pax A920 includes an in-built printer for printing receipts with a thermal paper roll.
Here are the steps for changing the printer paper roll:
- On the back of the card reader, pull down the paper lid release leaver and take the whole lid casing away
- Remove the paper roll by simply pulling it out of the slot
- Insert the new thermal paper roll in the same slot with the glossy side of the paper sheet facing out the top
- Pull out around 2 inches of the paper sheet and close the close over it, until the lid snaps into place
- Tear off any excess paper
Now your card reader is ready to produce receipts after each transaction.
Taking payments
To learn more about taking payment via smartPOS app visit our POS application user guide.